

Share This Article
This post may contain affiliate links and we may get paid a small commission if you click on a link.
Please read our privacy policy and cookie policy.
Mini twists have become one of the most popular protective styles amongst Naturalistas, and it’s easy to see why. If you’re active on social media, you’ve probably seen countless videos of people sharing their mini twist routines, styling ideas and impressive length retention results.
Alongside their versatility, mini twists are often credited with helping reduce breakage and making it easier to retain length. If you’re looking for a protective style that supports healthy haircare habits, mini twists are well worth considering. They’re easy to maintain, offer plenty of styling options and can become a valuable part of a consistent Type 4 hair routine.
In this guide, we’ll cover everything you need to know, including how mini twists support hair growth goals, how to maintain them, and how to get the best results from the style.
Are Mini Twists Good For Natural Hair?
Yes, mini twists can be an excellent protective style for natural hair. They help reduce daily manipulation, keep your hair stretched, and protect your ends from excessive wear and tear.
Mini twists are created by dividing the hair into small sections and twisting two strands together from root to tip. The style works on different hair lengths and textures, with or without extensions.
One of the biggest advantages of mini twists is their versatility. You can wear them in multiple styles and maintain them without placing excessive tension on the scalp. As with any protective style, the results depend on how well the twists are installed and maintained throughout the wear period.
Do Mini Twists Make Your Hair Grow?
Mini twists do not directly increase your hair’s growth rate. Factors such as genetics, overall health, and scalp health play a much bigger role in how quickly your hair grows. However, mini twists can support length retention by protecting your hair from mechanical stress caused by daily styling and detangling. This makes it easier to retain the growth you’re already seeing.
Here are five ways mini twists can support healthy hair growth goals:
- Protected Ends: Mini twists help protect the oldest and most fragile part of your hair by reducing wear and tear from daily styling and handling.
- Low Tension Style: Mini twists place less stress on the scalp and hairline in comparison to other protective styles. This helps maintain a healthy environment for new hair growth.
- Helps Reduce Single Strand Knots: Keeping your hair stretched and tucked away can help reduce tangling and single strand knots, which are common causes of breakage in Type 4 hair.
- Helps Reduce Breakage: Less daily manipulation means fewer opportunities for unnecessary breakage. This can improve length retention over time.
- Helps Retain Moisture: Mini twists make it easier to keep your hair moisturised. Well moisturised hair is often more elastic and less prone to breakage.
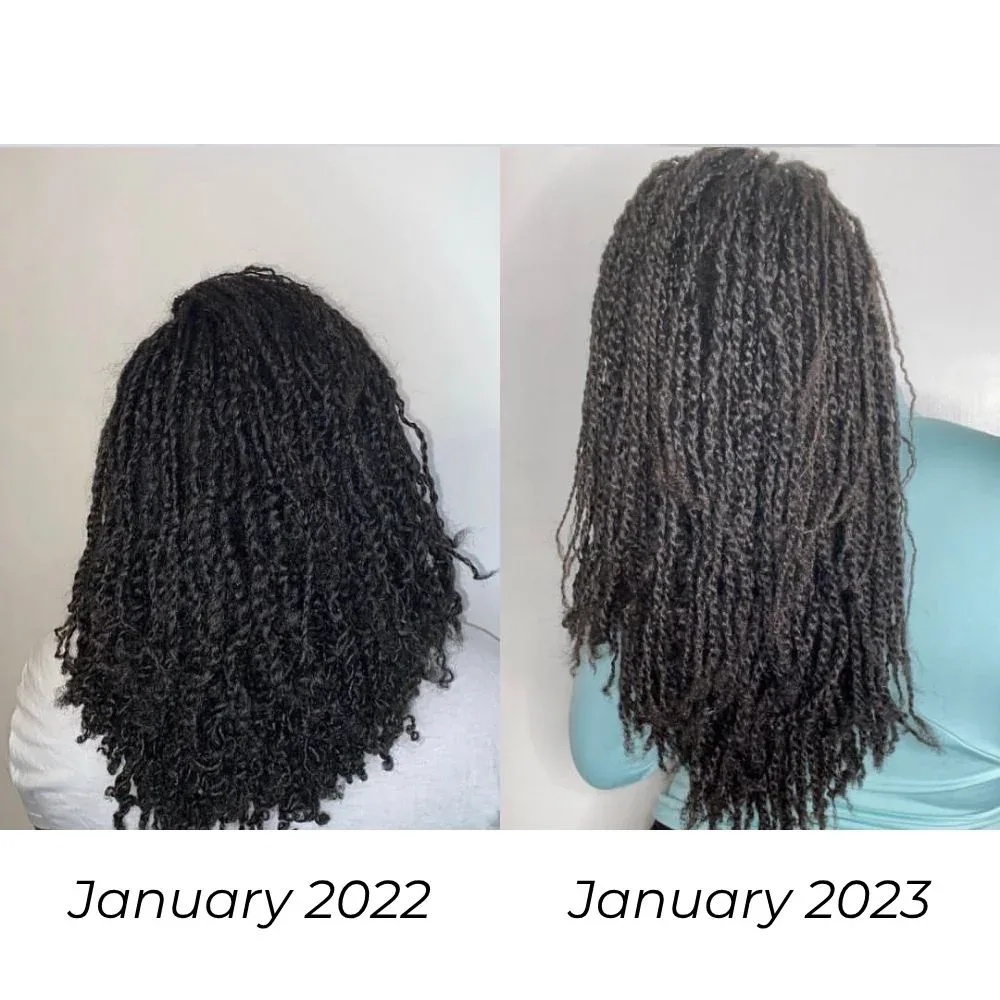
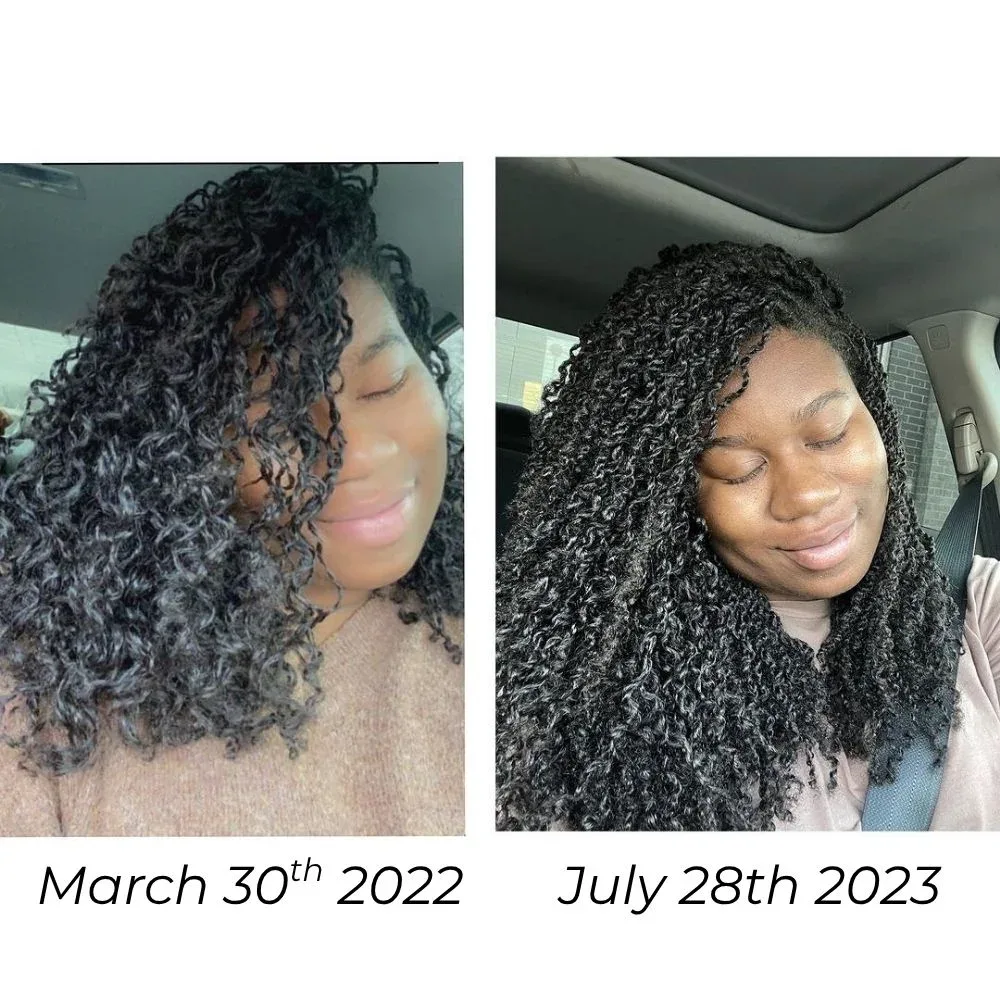
Take a look at Shaneal’s hair growth comparison whilst wearing twists. Her instagram @curlcodeblack documents her growth journey and you’ll notice mini twists are a regular part of her protective styling routine.
Aside from supporting length retention, mini twists offer several other benefits, including:
- Easy to maintain
- Versatile styling options
- Easy removal process
- Reduces tangles
- Keeps the scalp accessible
- Doubles up as a twist out
Are Mini Twists Good For Type 4 Hair?
Yes, mini twists are one of the most popular protective styles for 4A, 4B, and 4C hair. They help reduce daily manipulation, keep your hair stretched, and minimise unnecessary breakage.
Many people with Type 4 hair experience shrinkage, tangles, and single strand knots. Mini twists can help minimise these issues by keeping the hair in place and reducing friction between strands. They also provide easy access to your scalp, allowing you to cleanse and moisturise your hair without taking the style down.
Like any protective style, results vary depending on how well the twists are maintained.
How to Do Mini Twists?
Mini twists are relatively easy to install and can be done at home without visiting a hairstylist. All you need is a few hours and some patience. Your first attempt may not be perfect, but your technique will improve with practice. If you’re thinking about using hair extensions then it might be worth getting a friend to help or watching a tutorial to understand how to attach the extensions to your natural hair.
What You’ll Need
Before you get started, gather the following tools and products:
- Wash day products (shampoo, conditioner, leave in)
- Detangling Brush
- Rat Tail comb
- Hair Clips/Separators
- A twisting butter or cream
- Gel (Optional)
We’ve rounded up some of our favourite products for installing and maintaining mini twists below.
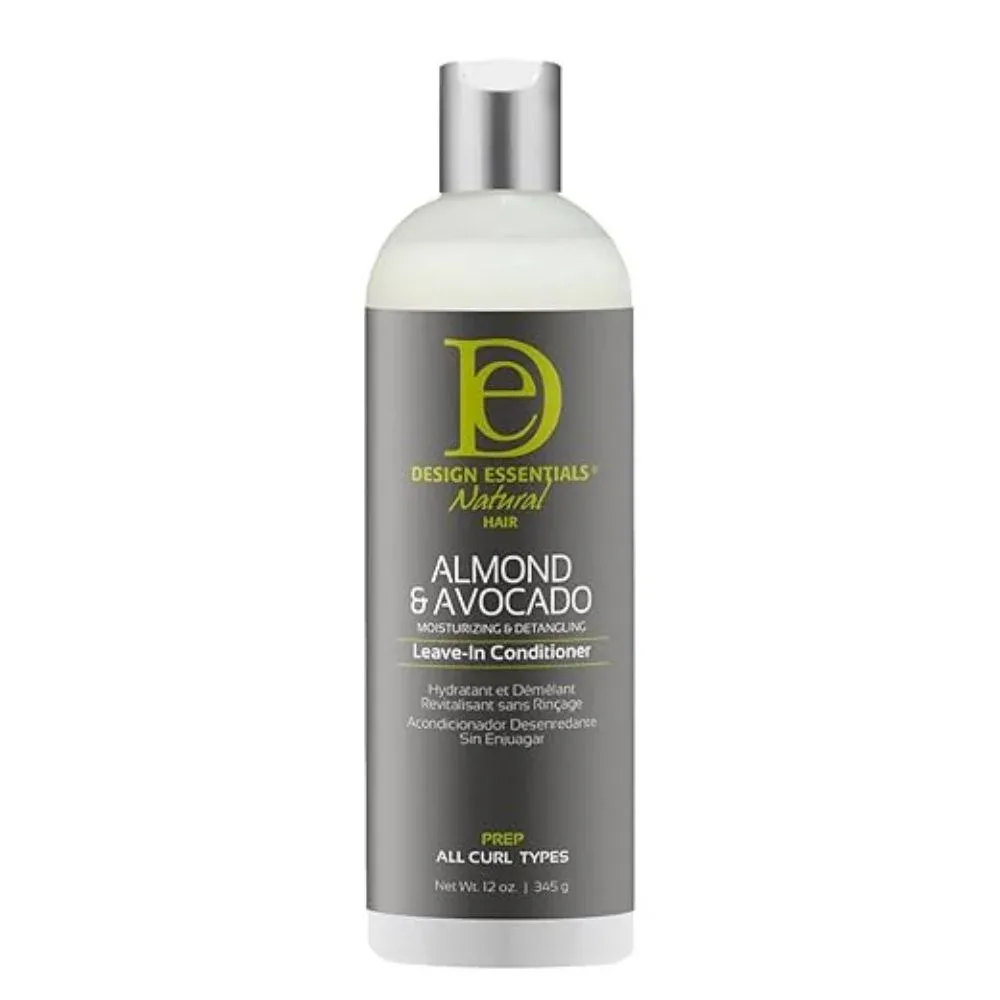
leave in condtioner
Design Essentials Almond & Avocado Leave In
Why Type 4 Hair Loves It : Lightweight moisture, detangling slip and frizz control before twisting.
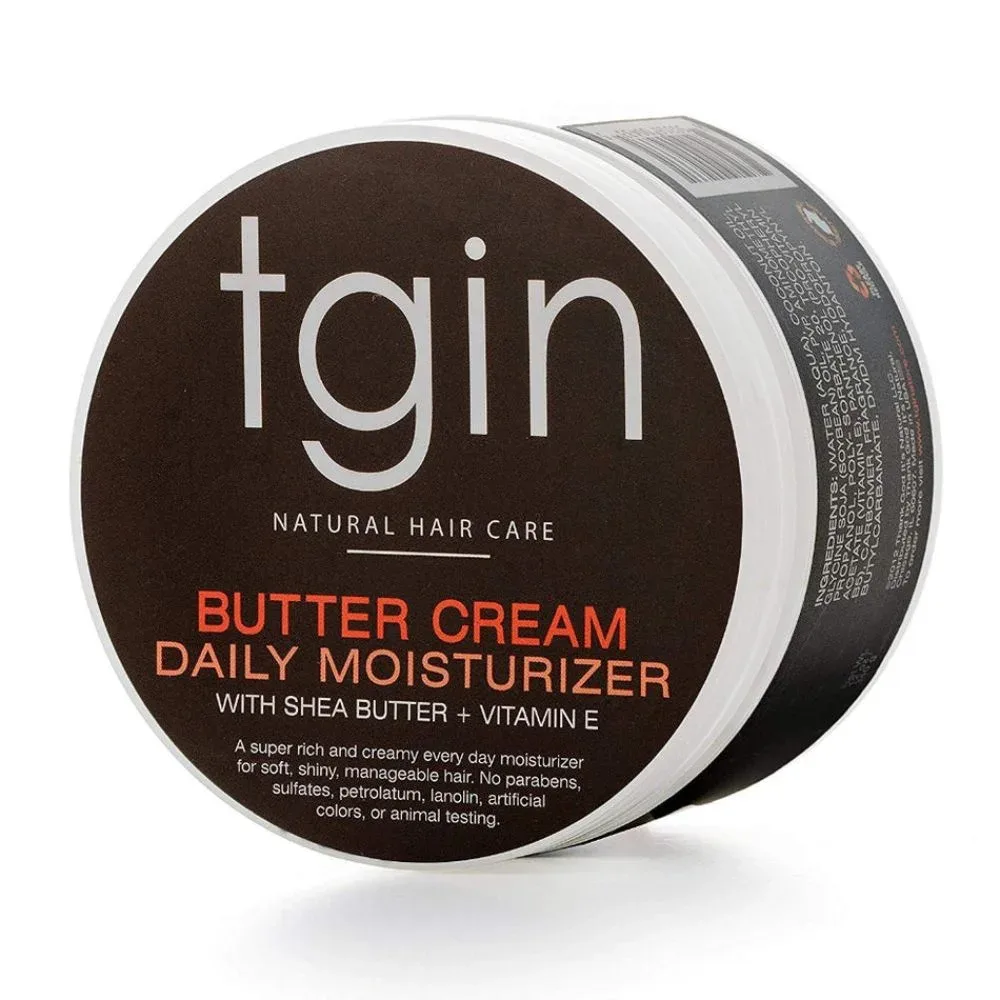
twisting cream
tgin Daily Moisturizer Butter cream
Why Type 4 Hair Loves It : Defines twists, reduces frizz and provides long-lasting moisture.
detangling brush
UNbrush
Why Type 4 Hair Loves It :
Gently removes tangles and shed hair with less pulling and breakage.
lightweight oil
Jojoba oil
Why Type 4 Hair Loves It :
Helps lock in moisture without weighing hair down.
Step-by-Step Guide for Installing Mini Twists
Step 1 – Start off with Freshly Washed Hair:
Follow your normal wash day routine. We recommend deep conditioning before installing mini twists to help improve moisture levels and manageability.
Step 2 – Moisturise and Detangle Thoroughly:
Apply your leave-in conditioner on damp hair and work through, focussing on the ends of your hair. Finger detangle first, then follow with a detangling brush. Make sure your hair is fully detangled.
Step 3 – Section Your Hair:
Start with four large sections, then divide each section into smaller parts as you work. Use your hair clips to keep the hair in their allocated sections. You can also twist or braid each section if you prefer.
Step 4 – Create Smaller Sections:
Use a rat tail comb to split the section into smaller parts of 1 – 2 inches depending on the size you’re trying to achieve. Apply your twisting butter or cream to the parted section to prep for twisting
Step 5 – Start Twisting:
Divide the section into two equal parts and twist them together from root to tip. As you get towards the ends, you may need to apply more cream or butter if it feels dry and then twirl the ends with your fingers once the twist is complete.
Step 6 – Repeat Until Complete:
Continue step 5 until you’ve completed your whole head of hair. It’s okay to take a break in between sections. Take your time to keep your twists neat and consistent.
Step 7 – Seal Your Ends with Oil:
Seal your ends with a lightweight oil such as jojoba, grapeseed or almond oil to lock in moisture.
NOTE: If you’re interested in doing the 3 strand twists, the process is pretty much the same. The difference is you’ll be splitting the parts into 3 sections and twist around each other. As a beginner, it’s best to stick to 2 strand twists until you’ve got the hang of things.
How long should I keep my mini twists?
Most people keep mini twists in for 4 to 8 weeks. The ideal length of time depends on your maintenance routine and how well the style holds up.
Like any protective style, mini twists require regular maintenance to keep your scalp and hair healthy. Cleansing, moisturising, and protecting your hair at night can help minimise breakage and keep your twists looking their best.
One thing to keep in mind is that mini twists can begin to mat or loc if they’re left in for too long without proper maintenance. If you plan to wear them for several weeks, pay close attention to your roots and take down the style if you notice excessive tangling or matting.
How should I maintain my mini twists for hair growth?
Here are some things you can incorporate into your mini twist maintenance routine.
Keep On Top Of Wash Days
Regular cleansing helps keep your scalp healthy and minimises product build-up. If your goal is healthy hair growth and length retention, keeping your scalp clean is essential. It’s also best to wash your hair in sections to reduce frizz and prevent the twists from rubbing against each other.
You can apply a mousse after washing to help smooth frizz and refresh the style. Don’t forget to follow up with a conditioner and leave-in conditioner to keep your hair moisturised.
Sleep With A Silk Or Satin Scarf Or Bonnet
This is a must do if you want to retain moisture and minimise frizz. It’ll keep your hair neat and help you maintain your twists for longer. You can also sleep with a silk pillowcase for that extra protection.
Avoid Wearing Your Twists Down All The Time
Mini twists offer plenty of styling options, so try not to wear them down every day. Constant friction from clothing can contribute to dryness, split ends, and breakage over time.
This is especially important if you wear fabrics such as cotton, which can absorb moisture from the hair. Wearing your twists in buns, ponytails, or clipped-up styles can help reduce unnecessary friction.
Moisturise And Seal Your Hair Regularly
Afro-textured hair benefits from regular moisture. If your twists feel dry, lightly spritz them with water or a water-based leave-in conditioner. Follow up with a lightweight oil to help seal in the moisture.
Keeping your hair moisturised can help improve elasticity and reduce breakage, making it easier to retain length whilst wearing mini twists.
Care for Your Scalp
A healthy scalp creates a better environment for healthy hair growth. Pay attention to signs of dryness, irritation, or excessive build-up while wearing your mini twists.
If you enjoy using scalp oils or serums, apply them sparingly and focus on keeping your scalp comfortable and balanced. While these products do not directly increase your hair’s growth rate, they can support a healthy haircare routine when used alongside regular cleansing and moisturising.
How do you refresh mini twists?
Your twists shouldn’t need refreshing very often if you’re keeping up with your maintenance routine. However, if they start to unravel or look less defined, you can redo the twists around your hairline and nape to give the style a fresher appearance.
When refreshing your twists, be gentle. Apply a lightweight oil and carefully unravel the twist from tip to root. Once unravelled, lightly spritz the section with water and detangle.
We recommend finger detangling first before following up with your detangling tool of choice. This can help minimise unnecessary tugging and reduce the risk of breakage.
6 Ways to Style Mini Twists
One of the biggest advantages of mini twists is their versatility. Whether you prefer simple everyday styles or something more creative, there are plenty of ways to wear them. We’ve featured some of our favourite Naturalistas for styling inspiration.
1. Bun and Ponytail Styles

Credit : @curlcodeblack
2. Tribal Cornrows with Mini Twists
Credit : @opaglamz
5. Mini Twists with Curly Ends
Credit : @bohosoulsalon (Stylist) @nyreephotography (Photographer) @silk_sachet (Model)
6. Space Buns
Credit : @yolandaas
* We’ve linked the instagram pages of all the Naturalistas featured. Feel free to check out their instagram pages for more natural hair inspiration and give them a follow!
Mini Twist FAQ’s: Common Questions Answered
1: Can mini twists turn into locs?
Not if you’re wearing mini twists as a short-term protective style. Mini twists only begin to loc when they’re intentionally maintained over a long period without being taken down. If you leave mini twists in for too long without proper maintenance, the hair can begin to mat or tangle, making them more difficult to remove.
If your goal is to begin a loc journey using two-strand twists, it’s best to work with a stylist who specialises in locs. They can help you achieve the look you want while maintaining the health of your hair.
2: Should you install mini twists on wet or dry hair?
You can install mini twists on wet or dry hair, and the best option depends on your preference and desired finish. If you’re a beginner, dry hair is often easier to section, part, and work with.
For the best of both worlds, part your hair while it’s dry, then lightly spritz each section with water before applying your twisting cream or butter. Working on damp hair can improve product distribution, create a smoother finish, and help define the ends. Ultimately, choose the method that works best for your hair and styling routine.
3: How long does it take to install mini twists?
Installing mini twists typically takes 3 to 6 hours, depending on your hair’s length, density, and the size of your twists. If you’re installing them yourself for the first time, set aside a full day so you don’t have to rush the process.
It’s normal to take breaks, especially if you’re not used to sectioning and twisting your own hair. If you’d like to save time, ask a friend to help or book an appointment with a hairstylist.
4: Are mini twists with extensions good for hair growth?
Yes, mini twists with extensions can support healthy hair growth goals when they’re installed correctly. The key is to avoid excessive tension and use a similar amount of braiding hair in each twist. Using too much extension hair can place unnecessary weight on your natural hair. Like mini twists on natural hair, they won’t make your hair grow faster, but they can help reduce daily manipulation and protect your ends, which can reduce breakage over time.
To avoid unnecessary breakage, choose lightweight extensions and make sure the twists aren’t installed too tightly. Regular cleansing and moisturising will also help keep your scalp and hair healthy while wearing the style.
5: What is the best hair for mini twists?
The best hair for mini twists depends on the look you want to achieve. If you’re adding extensions, Afro Kinky, Marley hair, and Spring Twist Hair are all popular choices because they blend well with Type 4 hair and create a natural-looking finish.
If you’re looking for the most lightweight option, human hair extensions are worth considering. Although they’re more expensive, they’re reusable and place less weight on your natural hair. Plant-based braiding hair, such as Ruka, has also become increasingly popular. It’s designed as an alternative to traditional synthetic braiding hair and is often processed with fewer chemicals while still offering a lightweight finish.
Whichever hair you choose, avoid using extensions that are too heavy, as they can place unnecessary tension on your scalp and hairline.
6: What are the best products for mini twists?
The best products for mini twists keep your hair moisturised, defined, and easy to manage. A good routine typically includes a leave-in conditioner, a twisting cream or butter, a lightweight oil to help seal in moisture, and a gentle shampoo for regular cleansing. Avoid applying heavy products too often, as excess build-up can leave your twists feeling greasy and weighed down. We’ve shared our recommended products for mini twists earlier in this guide if you’re looking for specific recommendations.
Take extra care when using edge control, as it’s one of the products most likely to cause build-up around the hairline. Frequent use can also leave your hair feeling dry, so consider using a gel that contains humectants where possible. While the hold may not be as strong, it can be a gentler option for your edges. If you prefer a sleeker finish, wrap your hair with a silk or satin scarf after styling to help set the product.
If you’re looking for a lightweight gel to smooth your edges or refresh your twists, read our guide to the best gels for natural hair.
Final Thoughts
Mini twists are a versatile protective style that can support healthy hair growth goals by reducing daily manipulation and helping you retain length. Like any protective style, the best results come from following a consistent maintenance routine and keeping your scalp clean and healthy.
Whether you have 4A, 4B, or 4C hair, mini twists can become a valuable part of a consistent haircare routine when installed and maintained correctly.
We hope you’ve found this guide helpful and taken inspiration from the Naturalistas featured throughout the article. We’d also like to thank them for allowing us to share their photos and hair journeys.


